Organic Kitchen Gardening and my personal musings

This blog is about my experiments with Organic Kitchen Gardening and sometimes about other personal experiences of my life… Please leave a comment about anything that touched you. Comments help to keep the blogger motivated to keep blogging :)

Back In my Garden after 5+ years February 7, 2017

Filed under: Organic Farming and Kitchen Garden — rajapanda @ 5:34 pm

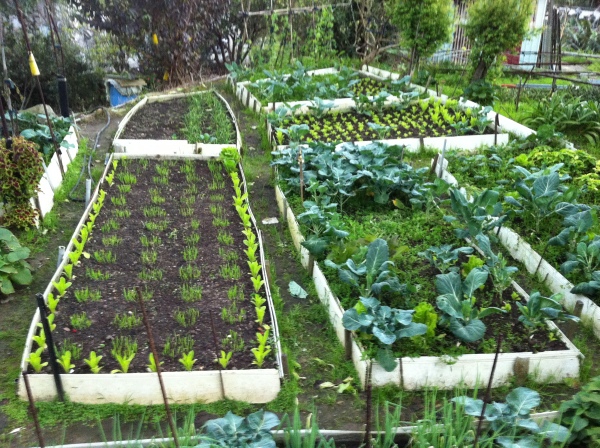
It’s been nearly 5 years and 8 months since we moved to Taipei from Bangalore. While moving out, i knew, it’s going to be long term. So, i deliberately looked to rent out the place to people who are interested in gardening. Hoping, they would best utilise the garden and can grow veggies and flowers. This is what i returned to, now.

My family is back in our beloved house and garden and very happy at that .We now have a junior gardener in the family, my 6 year old boy, who shows lot of interest. I am still travelling between here and Taipei.

I was in Bangalore for 2 weeks and wanted to set up the garden and hope it can be maintained by the young gardener and my wife.

Good to see the compost-er passing the test of time. It’s been about 6 years now. It was immediately put to use.

Sad news is, due to a new building which has come up on the backside, garden has lost access to the morning sun. It get’s sunlight only after 10:30 AM till evening in this winter. Will need to see the sunlight in summer. It will differ.

Cleaning 

As a first step, I cleaned up some plants and further intend to cut the banana tree , once this fruit is harvested. Main reason is, i don’t like this variety of banana much and i don’t want it to block the sunlight for other smaller veggie plants. Pomegranate tree will remain for now. Curry leave tree was downsized, current size is enough to support my needs and even the needs of all apartment in my block (16).

Soil Quality

Soil has become very hard due to long period of no watering. Also, rats and snakes have setup a network of paths under the garden. Other side of the garden is still a large piece of very thinly inhabited land. So snakes and rats are plenty. I assume rats have dug up holes from other side of the boundary to the garden and snakes continue to use those paths for coming in. So the soil has to be loosened up properly & good quantity of organic material needs to be added to it. Bought 2 bags of horse manure and organic manure from Lalbagh for that. As a protection against snakes we have planted “nagadalli” plants across the garden.

Soil Erosion

The natural slope of the garden is towards the boundary wall and the drainage system is setup near the boundary to make sure the rain water drains properly in this closed place. Builder had provided a green grass carpet for each garden and earlier i was kind of making small chambers in that for growing veggies. You can see pictures of that in this DIY drip irrigation post. The thick grass around was helping to make sure top soil erosion won’t happen in rains or while watering. I don’t have that luxury now and i don’t want to grow the green carpet again, as it was too much to maintain (pesticides, more watering etc..).


So i have decided to use raised bed gardening to solve this problem.

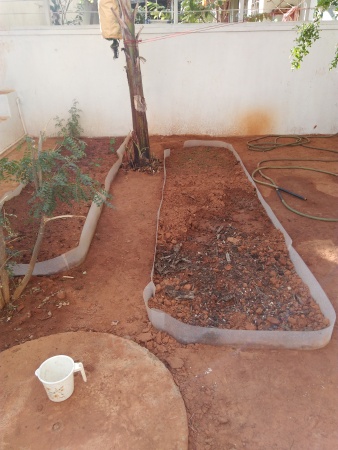
Raised bed are easy to maintain, soil remains relatively lose in the bed and erosion is less of a problem due to the protective wall around the loose soil. I used, semi-hard plastic sheet easily available in most HW stores to setup the first few raised beds and see how the experiment turns out. width of about 6 inch was enough for this. 2 inch below the ground and 4 inch above it.

img_20170205_191537

While ploughing the garden for the raised bed, i came across lot of networks holes of rats and used lot of water to fill them up. Hope they are closed and rats got a message, the garden is not abandoned.

Seeds Sowing

Bought some seeds, which i think can grow easily and won’t need stakes. Beans, brinjals and capsicum topped the chart. Missed buying some greens, but used methi available at home to grow some methi greens. In about 10 days, this is where we are:


Oh yes, covered up the banana.

Please excuse the typos and small grammar mistakes, in future i intend this to be more of a photo blog with less writing (to save time). See you next time. Do leave comments.


Am Back February 24, 2012

Filed under: Organic Farming and Kitchen Garden — rajapanda @ 2:33 pm

It’s been a really loooong time…. Close to 13 months !! And I’m finally posting a blog post.
No excuses, but the time just …

Lot’s of new development in life. We are blessed with a baby boy in Feb last year. And I have taken up a job in Taipei, Taiwan(Chinese Taipei) since last July. The garden (apartment) is now given on rent. So, you see! there are some valid excuses for not putting the pen to paper (hand to the keyboard!).

Last weekend i just happened to visit a Strawberry farm in Taipei and thought of sharing few pics with you all. So, here you go.

View from top of a Strawberry farm

Container grown, feels like it does a much more efficient use of space. The farm is promoted as a tourist spot and is located on a hill (Taipei is surrounded by lot of small hills). So on weekends/holidays one can find lot of people going there for a walk/trek, picking up strawberry on their own (paying the owner on their way out of the farm) and having a good time…

Here is what i picked for myself… Looks yummy, right ?

To me it looked like the farm is owned by lot of small farmers, who also allowed visitors to pick their choice of greens and vegetables.

And finally here is the dragon bridge 🙂

Hopefully i’ll do more post about Taipei in future.


Betel leaf(Pan) plant January 26, 2011

Filed under: Organic Farming and Kitchen Garden — rajapanda @ 7:12 am

On my last visit to my native in Odisha I had the chance to visit a nearby village, Chandanpur. A very small village but very famous for it’s betel leaf or what is popularly known as Pan. The village is famous for it’s tasty betel leafs and even sends them outside the state of Odisha.

The betel leaf (Piper betle) plant is an evergreen and perennial vine and has a reputation to be very a sensitive plant. I had the opportunity to visit on of the plantations and take some photographs and get some details from the owner. So, here you go….

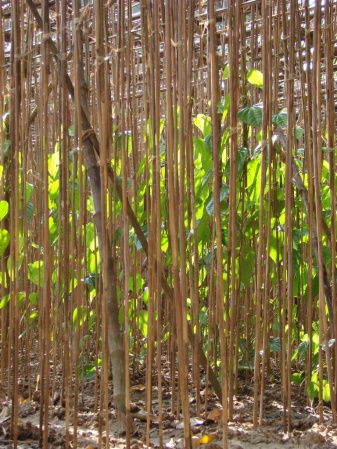
The enclosure that you see is where the betel leaf plant is grown. The enclosure is typically made of bamboo and covered from all sides by mats made out of coconut leafs. If you are just starting to wonder why are they growing on a small mountain like structure, hold on. I’ll explain.

Here is the entry to the enclosure. A typical enclosure is of 1500-2000 sft in size. Inside the enclosure there are rows of thin bamboo sticks meant to support the betel plant vine.

Each stick will support a single vine and as the plant grows it will be meticulously entwined on the bamboo stick. It takes roughly a year for the plant to grow and start yielding. However a plant can keep yielding for many years, roughly 20-25 years. amazing, isn’t it ??

The mountain like structure you saw in one of the pics above is formed because of top soil addition which is added every year. The enclosure is first made at ground level , however with passing time/years, top soil/ash is added to the roots of the plant almost covering the base resulting in a mound or this mountain like structure.


This grew in spite of me January 20, 2011

Filed under: Organic Farming and Kitchen Garden — rajapanda @ 2:24 pm
Tags:

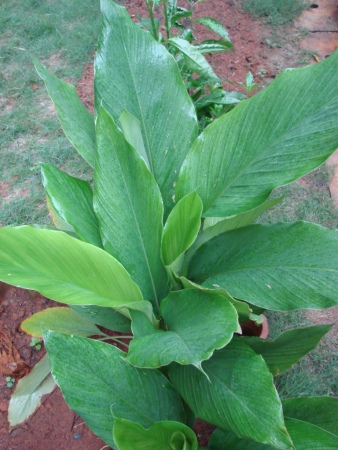
That’s true and am talking about Turmeric. Don’t quite remember when my wife had got these 3-4 plants, it was a Sankranti day i guess. That’s the day when it’s common to see vendors selling turmeric plants in the market. I think kanadiggas use it in their puja. The earliest photo (one below) i have is from Aug last year. I think i had bought it roughly 3-4 months before that. Any one remembers the exact date ??

They were lying there for 2-3 days almost on the verge of drying out when my wife coaxed me to planted them. I planted them in 2 different corners of the garden, hoping, at least they will act as some sort of deterrent to pests. Being an organic gardener, i am often willing to try out these undocumented and intuitive methods and see how it goes. It doesn’t always have to be well documented or scientifically proved way of pest deterrence. But what followed after that was not very intentional. Being in two corner of the garden they received less attention from me. Some time i was even downright negligent and missed watering them regularly.

Of course i have been little negligent of my garden in the past few months owing to some personal reasons. But that’s a different story, which i’ll share some other time.

So, now you know why i say this plant has grown in spite of me. But now that i’m in mood to clean up the garden and start another active growing season i decided to take out these turmeric plants which had almost dried up (my negligence or is it end of life for the plant??). Well i was in for some pleasant surprise. First shoots….

Turmeric

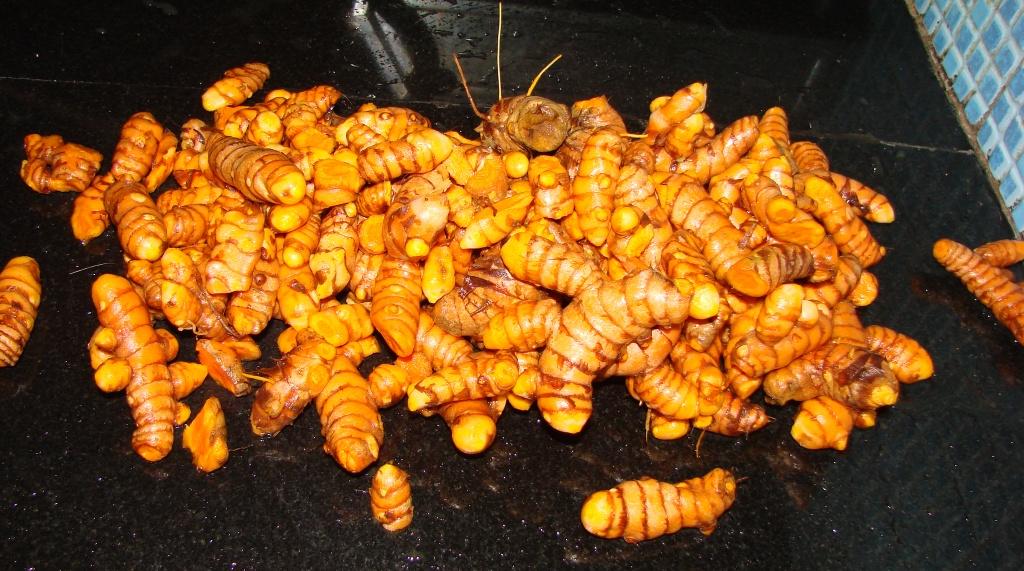
After just rooting out the plants i realized there is something down there and i have to dig it out and be careful while doing it. So, after a patient 15 minutes of digging i got this 1.6 kgs of turmeric!!!! Can you believe it ?? 1.6 kg from just 2 plants in one corner. That surely surprised me big time.

Washed and cleaned of all small tubers it’s still 1.5 kg of raw turmeric!! That makes me about my earliest memory of raw turmeric. Well it goes back to childhood days when we were made eat them raw to cure worms.. yuk!! But, still better, if you come to think of it, because now we probably use some kind of tablets (some chemical !!). isn’t it ??

Also, my maternal grandpa (who passed away when i was just a kid) used to grow and trade turmeric big time. Up there he must be very happy at these results, i guess.

So, now i have to find a sure shot way to make this raw turmeric into powder. I think this produce coupled with the other bunch which is waiting to be harvested will go a long way in making me self sufficient in turmeric powder for a year. Right ??

You know of any sure way to make turmeric powder from this ?

Lot of topics are waiting to be written about.. like strawnberry, Broccoli, Corn 🙂 Stay tuned.


Drip Irrigation for Kitchen Garden – DIY November 1, 2010

Filed under: Organic Farming and Kitchen Garden — rajapanda @ 5:00 pm

This has to be one of the most common problem faced by gardeners – How to take care of the watering needs of the garden while travelling out of station.

1 or 2 days travel days is still ok, plants can manage, but when one is travelling for over a week and has to leave the plants either on the mercy of rain gods (if the plants are in open to sky position) or some one else’s mercy then half the fun of travel is killed by worrying about the plants.

So, i thought of setting up a drip irrigation system to take care of my plants for my upcoming travel and here I’ll share the learnings from the whole exercise for my readers.

I was keen on exploring 2 optoins:
1. Set up a motor controlled by a timer and connected to a tap, which operates (switches on and off) at pre-determined times and connect the garden with pipes from there.
2. Set up a drip system where the input is directly from my tap and the tap is kept running continuously (probably 10% open) but drip system takes care to release a very a low and controlled amount of water to the plants.

After lot of deliberation I selected the 2nd option mainly because it was cheaper (no motor & timer cost), less complicated and doesn’t involve use of electricity. The only negative i could think of against the 2nd option was it should might waste more water and also the risk of over watering the plants. Remember – over watering is equally or even more dangerous than less watering.

The exercise started with a trip to the KR Market,Bangalore with plenty of time in hand (started early morning around 9). KR Market can look very chaotic and intimidating for someone who is not very familiar with the structure in which it operates. But once you know how to navigate it, it’s really the best place to shop for such ‘Do It Yourself’ – DIY projects in Bangalore. Basically every category of stuff is available in a particular section (street?) of the market, be it machine tools, electrical stuff, pipes, etc etc… One just needs to first navigate to the right street and after that its really a cakewalk. Typically there are number of shops offering the same kind of stuff in any particular street and the prices are mostly at wholesale level. Unfortunately the streets are not clearly marked with Main,Cross numbers like in the city and hence most of the direction are given by locals in terms of 2-3 streets after/before such and such place. So, i’ll stick to the same method. The street that we are discussing here is very close to the Juma Masjid. If you consider standing on the SJP road with Masjid to your left side then the street will come to your right. Take a right turn there and navigate your way through maze asking local shop keepers about drip irrigation shops and you should reach at the right place.

All the shops there have more or less similar pricing vis-a-vis quality of goods. But it’s always advisable to do your homework well before you reach there for buying stuff as you read in a little while.

Drip Irrigation Material Required
==================

Before that let’s start with the components that were required to make the drip system work for my garden:

1. A connector from the tap to main pipe line of the drip system. This will depend on the kind of pipe you have as input. So, it’s better to take a measurement of the pipe with you.

2. Main pipe line –

This is like the backbone of the drip system. It will be required to be laid through out the garden where one needs water to reach. It’s available in 3 sizes – 10mm, 12mm, 16mm. I chose the 12mm as it looked reasonably wide for my garden size and was priced ok. It cost me Rs. 3.75 per meter. so, it makes sense to measure the size of pipe you will require for your garden before going shopping. It will depend on the layout of ones garden and where the main pipe is etc.. Just for convenience sake keep the measurement handy in units of meter (a meter is roughly equal to 3 ft.) The first pipe in the pic below is of main pipe.

3. Vein Pipe –

These are very thin (2mm ?) in size and will be plugged in to the main line via a connector. One end of the vein will be connected to the main pipe via connector and the other end will be attached to the dripper/emitter which will drip water on the plant. Second pipe in the pic above is that of vein pipe.
Dripper, vein pipe and connector can be attached simply by pressing by hand and its really simple and easy.
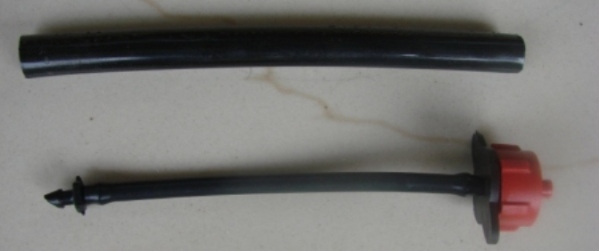
4. Dripper/Emitter and the connector.
In the first picture above, to the left of the vein pipe is the connector and to the right is the dripper. Here is a closer broken down look of the dripper
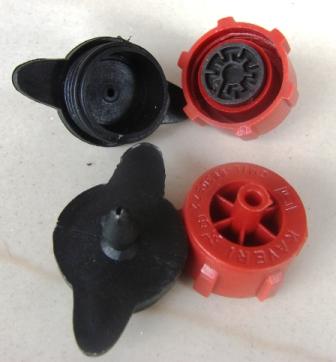
5. Bends, Joints and End connector.
Although the pipe is flexible enough to bend, once you bend it without the help of proper joints/bends the free water flow will get affected and it will be difficult for the water to travel after the first 1-2 joints. So, it’s always better to use the proper joints. Basically there are 2 kinds of joints T and L. The end connector is just like a tap with a valve on it which allows to open/close the water flow. For end points i.e., points where the main pipe will end one can put the end connector with the valve closed.
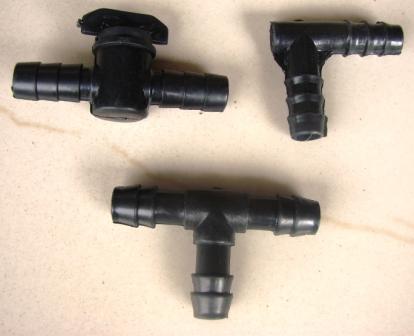
5. Joining the Main pipe to the vein pipe and dripper.

Make a small hole in the main pipe with the help of a small nail or a small prick (forgot the exact name but you get a pricker too in the market) . Now push the connector into the small hole in the main pipe in the main pipe and you are done.

Something like this.

That is pretty much the material one will require to get going.

Process to setup Drip System
=================

So, let me share the steps I followed in setting it up.

First i laid the main pipe all along the path in which my plants are there including all my tiled veggie patches and pots. I took care to ensure that my tap is at a height above the main line of drip pipe just to ensure free flow of water even at less pressure.

The first step took me roughly 3 hours to set up. But the good thing is once this setup is done the rest can be done at leisure. In fact the only thing pending after this step is to connect the vein pipe and dripper to the main pipe at the right places. This can be done one pot at a time in leisure time. For each of the veggie patch i have kept 3-4 dripper depending on the size of the patch.

Now the bouncer. I started with an impression that that after setting this up i can just leave the tap open and my plants will be all set. The drippers will take care of watering the just necessary quantity of water to my plants. Unfortunately it didn’t work out that way. When i left the tap open at full flow, within an hour my whole garden and pots got flooded. So, the dripper themselves are not capable of ensuring the right amount of water for the plants. After lot of tweaking and testing i finally realized that if I keep the tap open at just 10% of its flow it works just fine giving just about enough water for the plants to survive.

This is important as i also have to take into account days when it might rain and further watering can lead to over-watering and rot the plants. so, it’s ok if i err a little on the less side. Plants will still be alive.

Here is the system in operation on my baby corn (or is only corn ?) plants
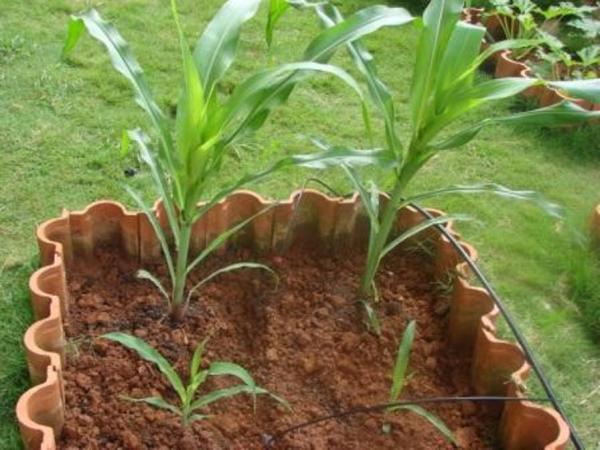
drip irrigation on corn plants

Here on the tomato plants in pots

Its been under testing for over 10 days now and seems to be working just fine.

Finally let me share my experience of shopping for these items in the KR market. The first shop i went to, me and the shopkeeper had a long chat and we discussed a lot of things about drip system . I figure it didn’t take him long to realize am a novice in this and he has got his bakra for the day. So, the shop-keeper was ready to sell me the all the stuff required for Rs. 1800/-. Though he wasn’t quoting a very high a price he was actually mis-calculating my quantity needs. He was trying to sell me the 300 mt (one full unit) of main pipe at 6 rs per meter and the rest of stuff was free with that. Then the second shop i went to, again we had a long discussion and this time the shop-keeper was trying to grossly over-price everything and bill came to 2400/- for just 150 mtr of main pipe and rest of the stuff.

The third shop i went to i knew exactly what i wanted and bought 130 meters of main pipe 20 meters of vein pipe and rest everything (joints,bends etc..) was priced around 1 rs per piece and the total bill came to just Rs. 570/-. So, the point is it pays to do your homework before going to buy anything even if it’s wholesale market. Go ahead and set up a drip for your garden and travel without worries about your plants 🙂
 

Paddy Chilli October 17, 2010

Filed under: Organic Farming and Kitchen Garden — rajapanda @ 3:51 pm
Tags: , ,

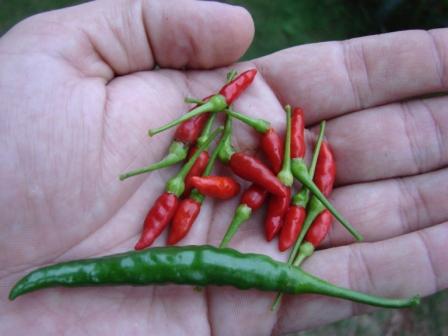
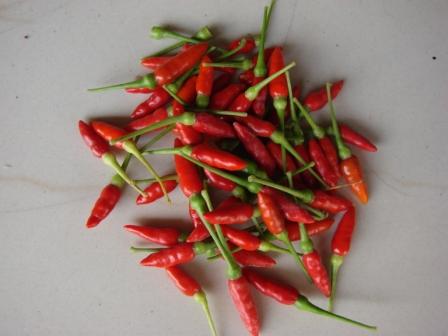
This is a variety of chilli which is famous in Orissa and Assam belt. We call it ‘dhana’ lanka in my mother tongue.

As you can see it’s hardly 1/5th in size of the typical chilli.

But, don’t go by it’s size, each of these chillies is as much hot as a normal sized chilli.

Chilli contains capsaicin, an alkaloid substance which makes it hot to taste. Did you know that there is a scale for measuring the spicy heat of the chilli? The scale is called scoville sacle . As you can see in the link, Naga/bhoot Jolokia (jalokia meaning pepper in assamese) from India is at the top of the table.

This variety of chilli is also a prolific producer and just 1-2 of this plant would make a family of 2 self sufficient for their chilli needs.
Take a look at the plant

Each week i have been getting a handful of harvest from this from plant, almost sufficient for my families needs.

I somewhere read that chilli plants in a kitchen garden will do well if they are kept close to a wall which receives sunlight because of the warmth they get from the wall. I think it works, as I have 2 chilli plants in pots in such location and they have been doing well since almost a year now. Also, chiili is a very hardy and low maintenance plant which makes it an absolute must in a kitchen garden. Do get in touch with me if you would like to have some seeds for chilli plant.

This weekend i have worked on setting up a drip irrigation system for my kitchen garden especially to take care of the watering needs for my garden when am not around for longer periods. Next post will be on that, stay tuned 🙂

In the meanwhile there is an announcement for people who have interest on permaculture. There is a course ‘Permaculture Design Course’ in Darjeeling from Nov 14-28th!
Please find attached these 2 documents giving more details on the same.
1. PERMACULTURE_form_2010-5
2. NovPDC_Darj


Strawberry Runners October 10, 2010

Filed under: Organic Farming and Kitchen Garden — rajapanda @ 2:46 pm

Well!! it’s been quite a long break from blogging. So, let me get restarted with a very small post.

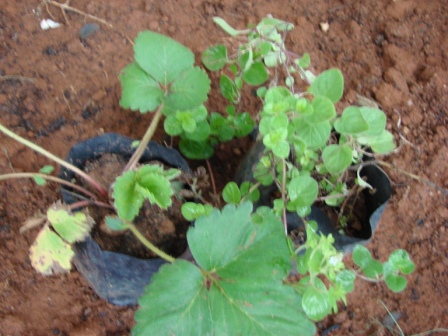
I had got this small strawberry plant from the Lalbagh Flower show. The plant on the left in the picture is that of strawberry and the one beside that is of oregano.

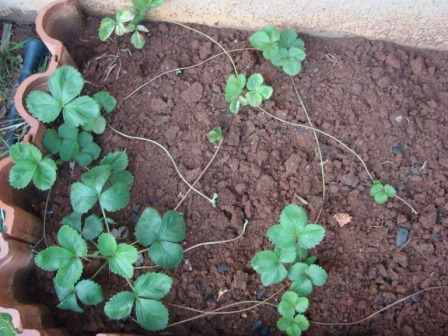
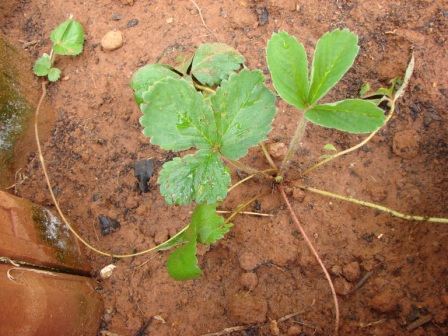
Before this i had only seen a strawberry plant once and had only heard that they multiply through runners. In just 2 months i not only got a chance to see what a strawberry runner is but also have seen my single strawberry plant multiply into 10 via runners.
strawberry runners

As you can see, the runner comes out from the base portion of the plant and it’s length it’s roughly 10 cm in length. The other end of the runner tries to find a landing and once it settles on a landing, root formation starts and at the same time leaves start forming and a new plant is born.

I am now eagerly waiting for the fruits 🙂 Lets see how much time that takes.


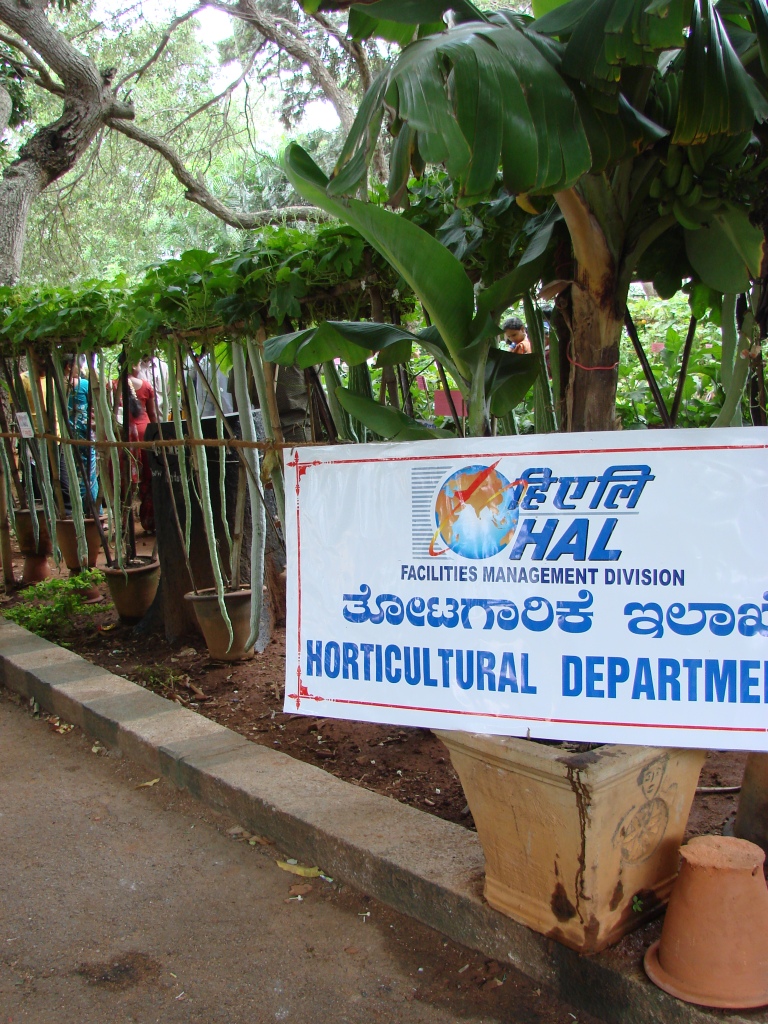
Lalbagh Independence Day flower show 2010 – Part I (veggies) August 10, 2010

Filed under: Organic Farming and Kitchen Garden — rajapanda @ 4:04 pm

I visited the flower show in Lalbagh last weekend.

Let me first post set of pictures of vegetable’s grown in container’s. In the next post i’ll post the flower pictures.

that's a favorite of mine, i keep growing it and now have lot of seeds saved


seeing this for the first time in India, i know of gardener who grows it in US though

those are snake gourd in the background, almost 5 ft long!!

pumpkins grown in container

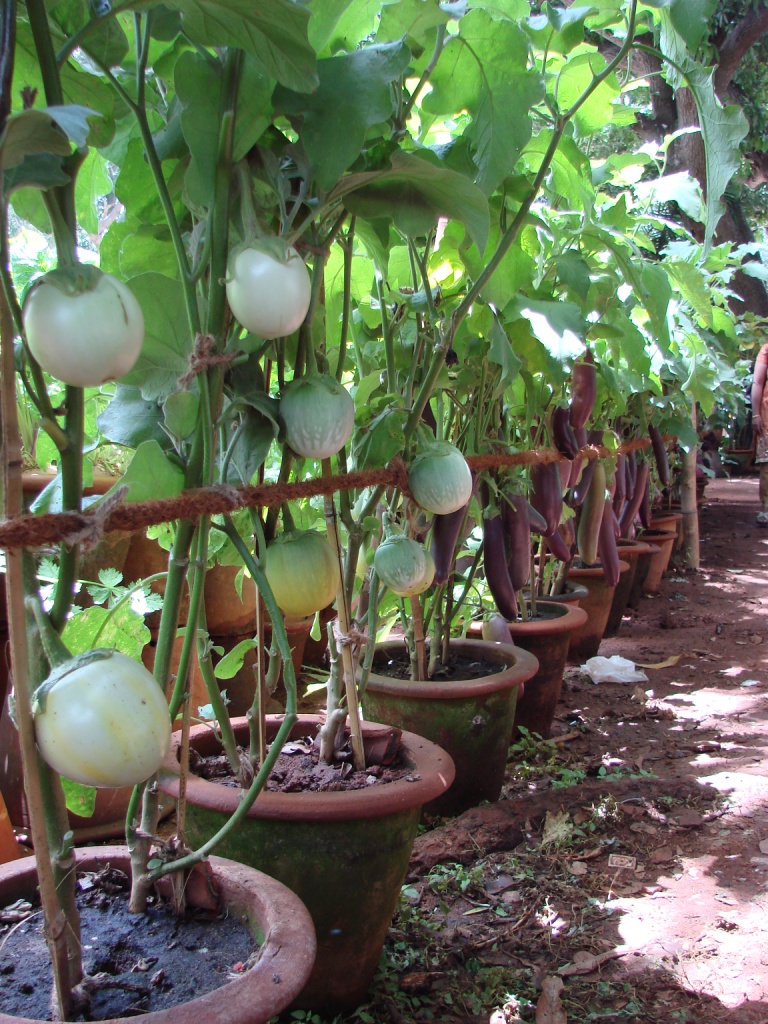
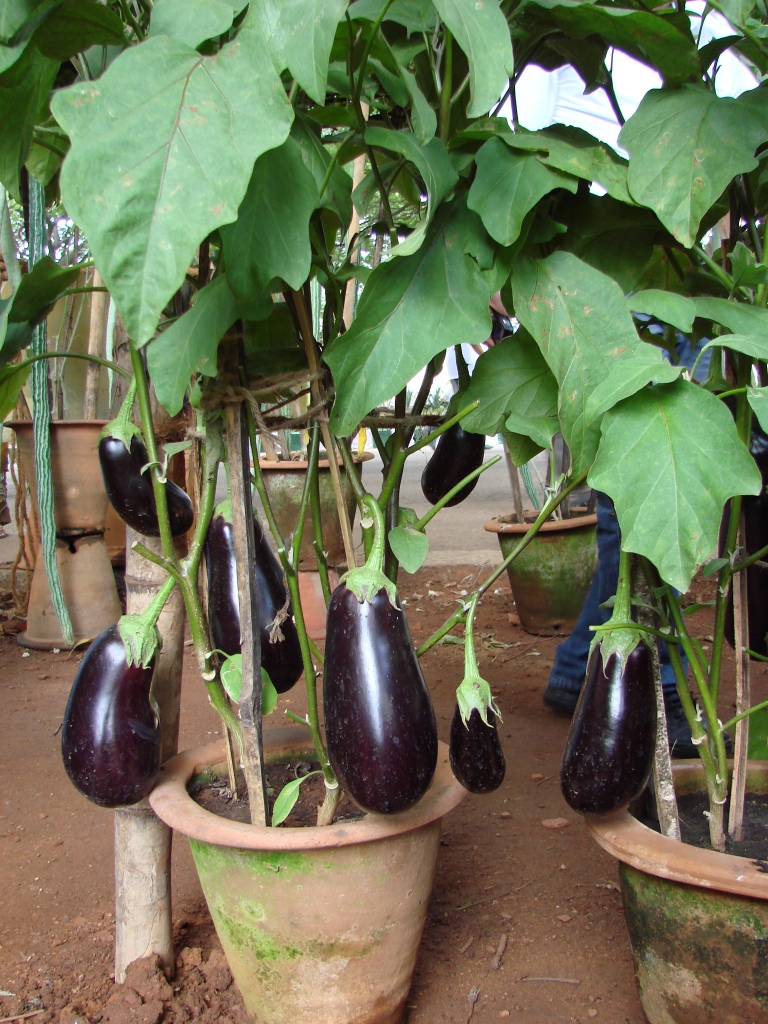
brinjal


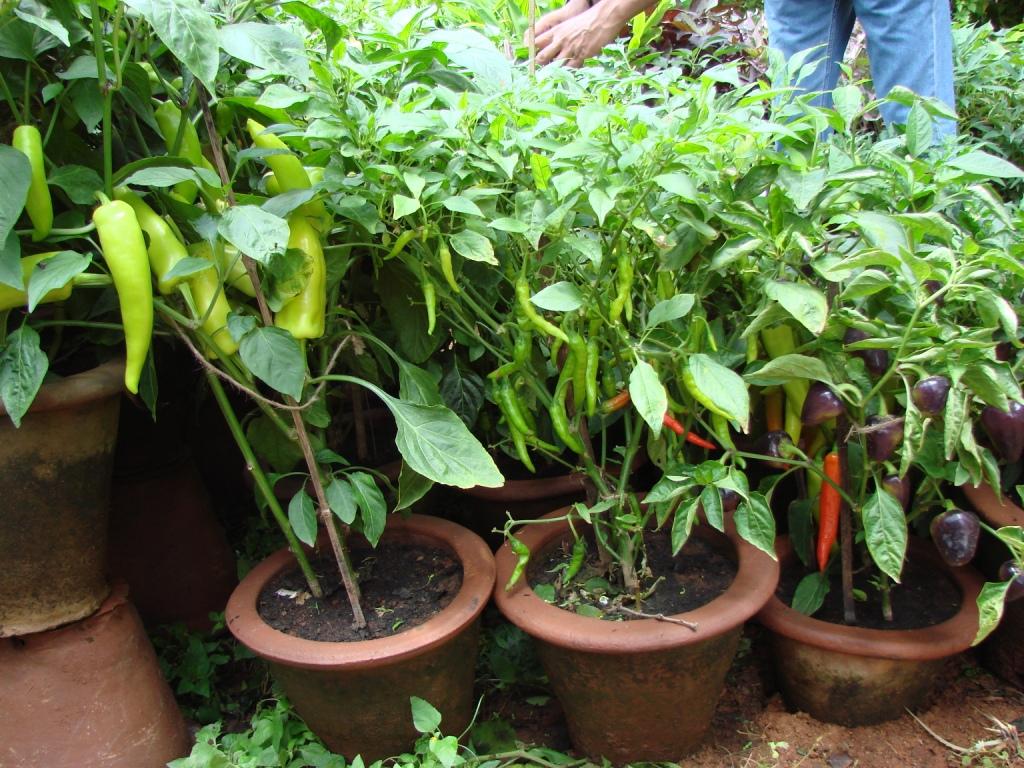
capcisum


different varities of chilli


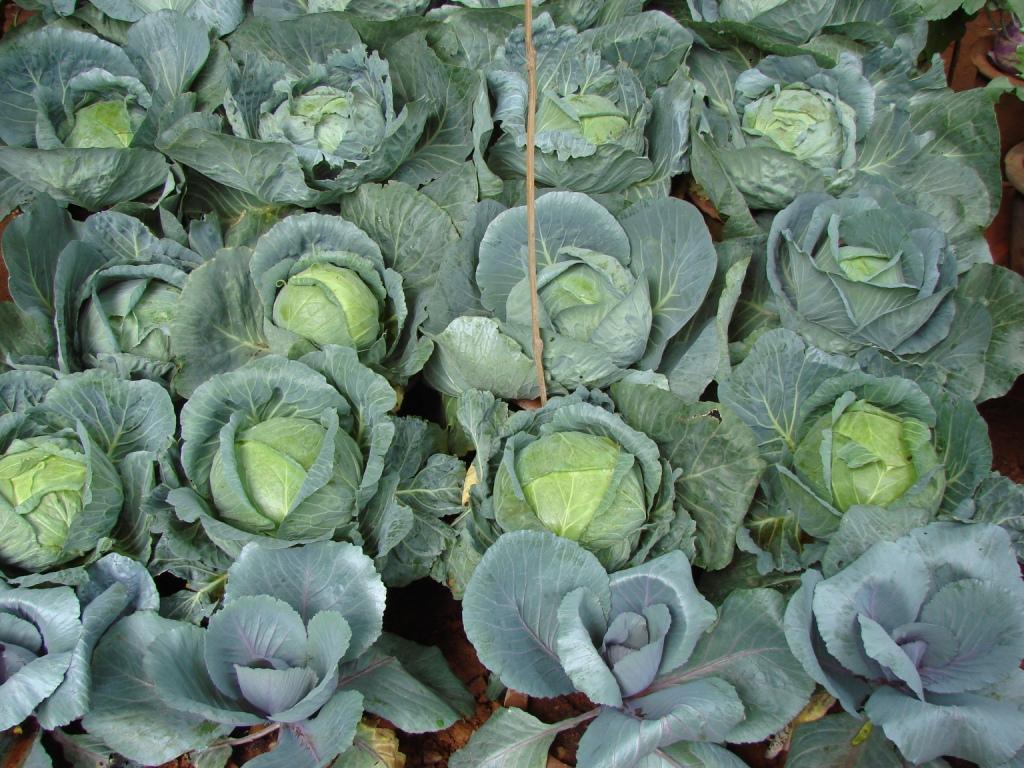
cabbages grown in container.. container are hidden beneath


really nice growth for container garden

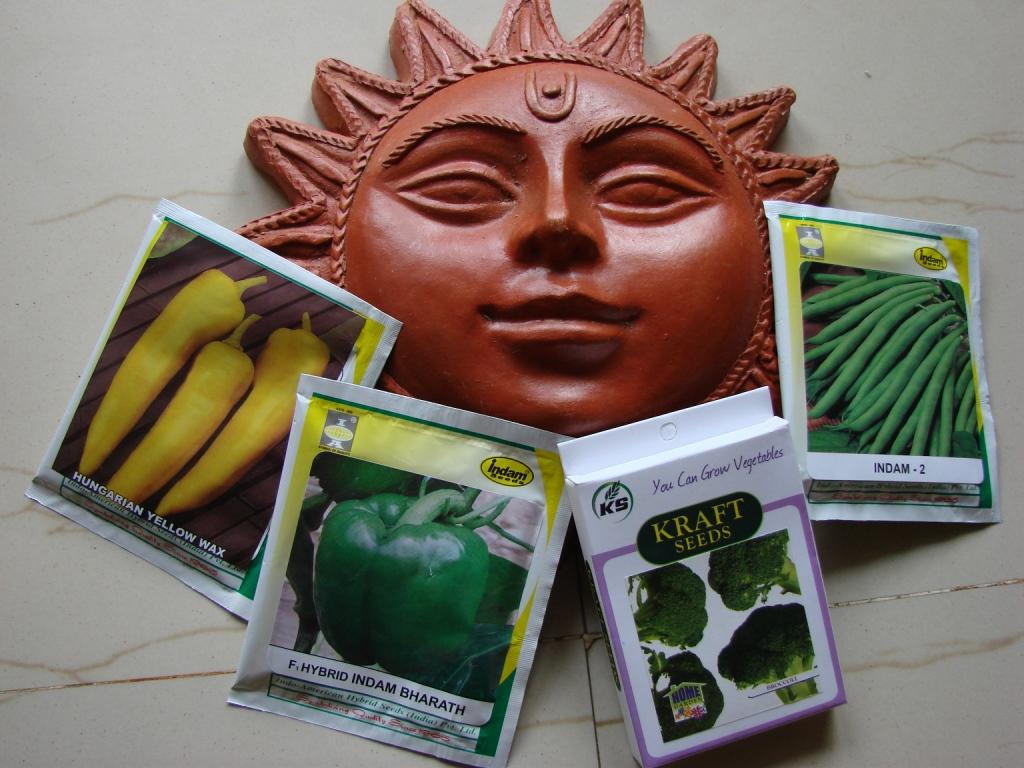
These are few seed packets that i bought. Am going to try growing Broccoli seeds for the first time.

seeds

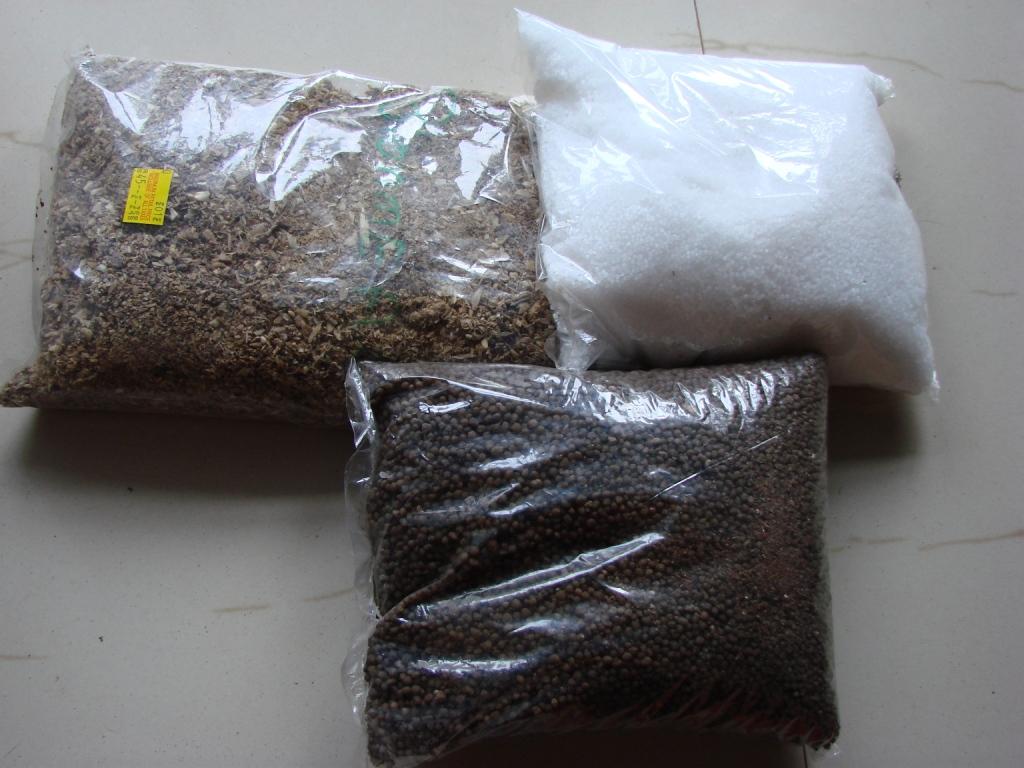
And here is a packet for bone meal (40/kg), urea(30/kg) and dap(30/kg). Urea and DAP are meant for my lawn grass only and the bone meal(5 kg) for my kitchen garden.

Bone Meal, Urea and DAP


Hope you enjoyed the pics as much as i enjoyed the show!


National Seminar on Organic Terrace Gardening August 1, 2010

Filed under: Organic Farming and Kitchen Garden — rajapanda @ 3:17 pm

University of Agricultural Science

Some 2-3 month’s back (or is it more?) i received the brochure for National Seminar on Organic Terrace gardening which is scheduled to happen on 9th and 10th of September 2010. Venue is Convention Center, UAS(University of Agricultural Science) Alumni Association, Hebbal, Bangalore 560024.

Although i always wanted to attend the seminar the thought of having to take leave on 2 working days made me defer my decision.

Now with only a month to go and with the knowledge that 10th September is a holiday for Id-ul-Fitar I have finally made up my mind to attend this.

There are 3 important aspects because of which i want to attend this seminar.

1. The first reason is it’s being organized by Dr. B.N.Viswanath, the man who is considered the pioneer of the concept of terrace gardening and his book ‘organic terrace gardening’ is probably one of the very few books on the topic from an Indian context. So, i expect the seminar to be really good.

2. The second attraction is of visiting the UAS campus itself. For the uninitiated UAS campus is one the greenest campus spread over 200 acres of land in the city of Bangalore, probably one of the few bastions of famed Bangalore greenery. My initial introduction to UAS campus was through my friends in the marathon group who were always waiting for a chance to go to UAS for a long run amidst the greenery. I could never make it there always owing to a different reasons but mainly because of the distance (it’s 20+ kms from my home). A bike ride from Bangalore south to Bangalore North on early mornings like 4:30 am held me back always. So, now that i have got a chance to visit UAS, i don’t want to miss it. I plan to travel by my car and will have 4 seats available. If you too plan to travel from Bangalore south ,feel free to drop me a comment to car pool.

3. Third and most important aspect is that of field visits on 2nd day of the seminar. I expect that to be a real good opportunity to meet people who are growing our food and get to learn and have fun.

The last date for registration is 30th August and there is good amount of time if any of you want to register for the event. So, what are you waiting for now ??

Attached here is the brochure for the Seminar. People who are interested to register can fill up this form and send it along with a draft of Rs.500/- (cheque will also do if it’s local- Bangalore) to the address mentioned in the brochure. Dr. Viswanath was of the opinion that he can also make available a account number to which the amount can be transferred online. Please contact him on the number given in the brochure to get more details about the same.

National Seminar Brouchre

Hope to see some of you there!!


THE END of Papaya plant July 21, 2010

Filed under: Organic Farming and Kitchen Garden — rajapanda @ 2:24 pm

I know that’s not good news. But that’s how life is… Mix of good and bad. isn’t it ??

The Papaya plant’s leaf turned pale and started drying up starting from top. Yah, that’s a departure from what i have seen in the past. Usually the leafs would get pale from the bottom, then dry out and fall. But this time it all started from top and in just a weeks time all the leaves have dried up.
Seeing the way it’s going i see very less chance of it’s revival.

papaya plant

papaya plant

I have no concrete idea on what could have caused this. Few reasons that I can fathom are:
1. I am seeing few white ant’s in my garden. Could they have eaten up the roots ? But can they bring down such a healthy plant in matter of just a week ?
2. The plant is now almost 14 month old.Could that be the lifespan of this variety ? But i still see lot of small papaya’s towards the top and it’s not normal for a fruiting plant to die so suddenly. I would imagine it would stop fruiting first before coming to end of life.

But when the logical thinking young generation can’t think of an answer you can always trust the older generation to come up with one. So, here are few reasonings floated by many of the old timers from my immediate family and friends. ‘Kisi ki najar lag gayi’, if you are an Indian you probably know the meaning. isn’t it ?? It simply means it burned because of someone’s evil eye 😦 Another theory is the plants and pets of a house take the evil eye on themselves and protect the home owner and family. I think we all have come across stories substantiating such theories in the past, right ?

For close to 6 month’s now it has been giving me very sweet and nutritious papaya’s. Although i haven’t kept any count of how many i have harvested till now my guesstimate would be close to 100. At an average weight of .5kg per papaya the total harvest has been some where close to 50 kg over a period of 6 months. Me, my family, many of my friends and many readers of this blog who had an opportunity to visit my garden during this period too have enjoyed it.

For a plant which has given such tremendous output and lived it’s life so fruitfully it definitely deserves a big thanks from me 🙂 So, instead of being sad about it’s end i want to celebrate it’s life and contribution to my family for all this time. It’s all good memories and it will be fondly remembered 🙂
In the meanwhile i have also got the ‘largest Brinjal’ harvest from my garden. it weighed a cool 400 gm and tasted delicious.

the largest brinjal

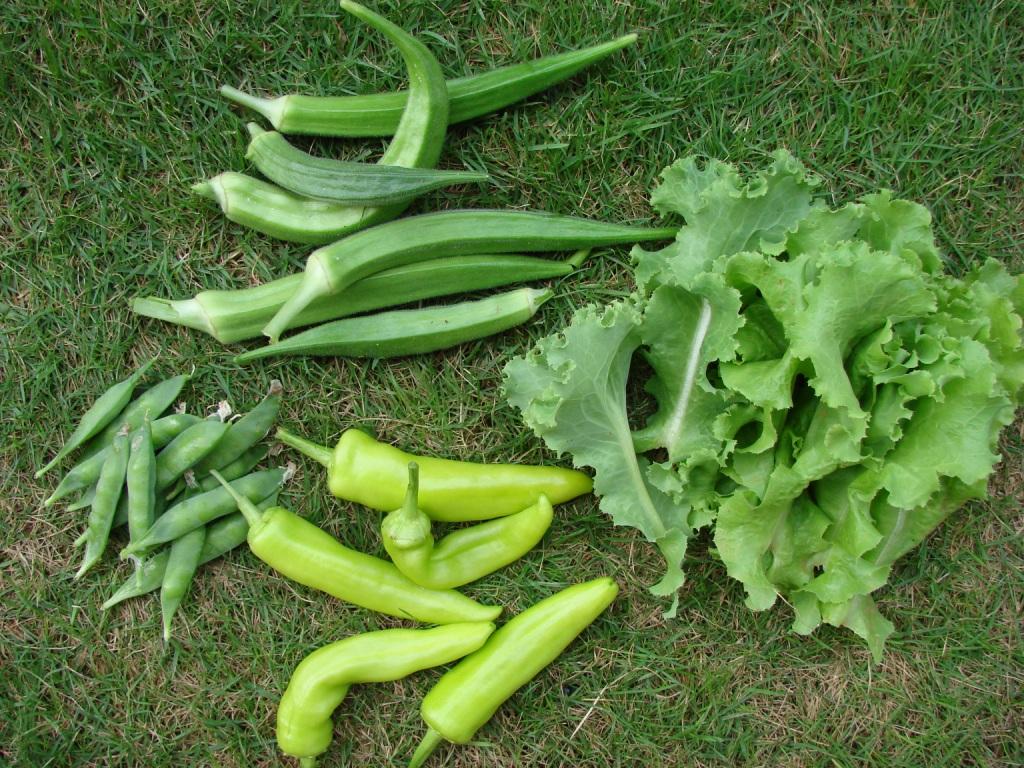
And here is one more harvest of peas, sweet pepper, lettuce and okra.

harvest